
今回は、WordPressのユーザープロフィールページにプロフィール画像を登録する方法について記事にしました。
最初はプラグインで実装しようと思ったのですが、無料枠ではパッとしたのがなかったので、
カスタムフィールドを利用して、プロフィール画像を簡単にアップロード・表示できる機能を追加しました。
コードはすべてfunctions.phpに記述しています。
完成後は、以下のような動作が可能になります。
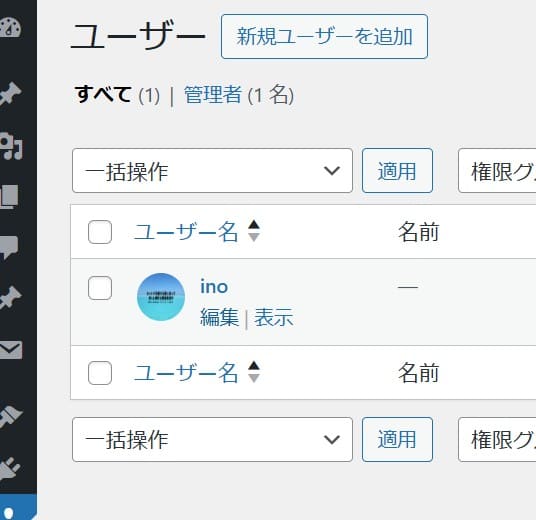
ユーザー一覧ページにも画像を表示。
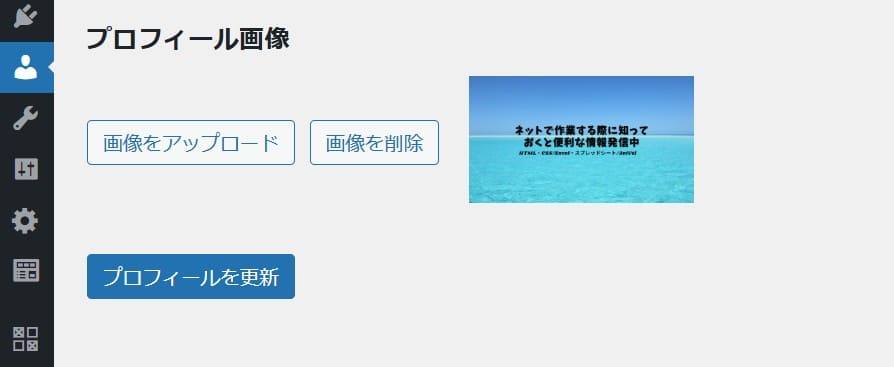
ユーザープロフィール編集ページで画像を登録できる。
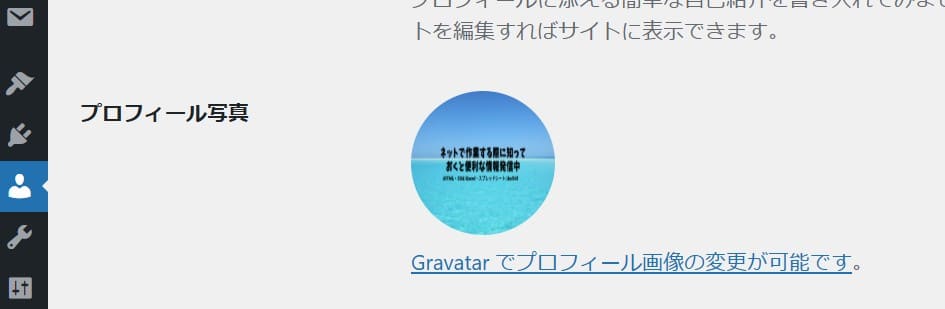
登録した画像がプロフィール写真として表示される。
それでは早速手順を見ていきましょう。
プロフィール画像登録フィールドの作成
まずは、ユーザープロフィール編集ページにプロフィール画像を登録するためのフィールドを追加します。
今回は下記のコードをfunctions.phpに記述しました。
function add_custom_user_profile_fields($user) {
	//画像IDとURL取得
	$image_id = get_user_meta($user->ID, 'custom_user_image_id', true);
	$image_url = $image_id ? wp_get_attachment_url($image_id) : '';

	wp_enqueue_media();
	?>
	<h3>プロフィール画像</h3>
	<div class="user-profile-image-wrap" style="display: flex; align-items: center; gap: 10px; margin-top: 10px;">
		<button type="button" class="button" id="upload-profile-image-button">画像をアップロード></button>
		<button type="button" class="button" id="remove-profile-image-button" style="<?php echo $image_url ? '' : 'display: none;'; ?>">画像を削除></button>
		<input type="hidden" id="profile_image_id" name="custom_user_image_id" value="<?php echo esc_attr($image_id); ?>">
		<div id="profile_image_preview" style="margin-left: 10px;">
			<?php if ($image_url): ?>
				<img src="<?php echo esc_url($image_url); ?>" alt="プロフィール画像" style="max-width: 150px; max-height: auto;">
			<?php endif; ?>
		</div>
	</div>

	<script>
		jQuery(document).ready(function($) {
			let imageInput = $('#profile_image_id');
			let imagePreview = $('#profile_image_preview img');
			let uploadButton = $('#upload-profile-image-button');
			let removeButton = $('#remove-profile-image-button');

			uploadButton.on('click', function() {
				e.preventDefault();
				let file_frame = wp.media({
					title: '画像を選択',
					button: { text: '画像を設定' },
					multiple: false
				});

				file_frame.on('select', function() {
					let attachment = file_frame.state().get('selection').first().toJSON();
					imageInput.val(attachment.id);
					imagePreview.attr('src', attachment.url).show();
					removeButton.show();
				});

				file_frame.open();
			});

			removeButton.on('click', function() {
				imageInput.val('');
				imagePreview.attr('src', '').hide();
				$(this).hide();
			});
		});
	</script>
	<?php
}

add_action('show_user_profile', 'add_custom_user_profile_fields');
add_action('edit_user_profile', 'add_custom_user_profile_fields');
このコードにより、ユーザープロフィール編集ページに画像をアップロードするためのフィールドを追加してます。
画像を保存する処理の追加
次に、アップロードした画像を保存する処理を追加します。
以下のコードをfunctions.phpに追加しました。
function save_custom_user_profile_fields($user_id) {

	if (isset($_POST['custom_user_image_id']) && !empty($_POST['custom_user_image_id'])) {
		update_user_meta($user_id, 'custom_user_image_id', adsint($_POST['custom_user_image_id']));
	} else {
		delete_user_meta($user_id, 'custom_user_image_id');
	}
}

add_action('personal_options_update', 'save_custom_user_profile_fields');
add_action('edit_user_profile_update', 'save_custom_user_profile_fields');
これで、画像アップロードフィールドで選択した画像が保存されるようになります。
ユーザー一覧にカスタムアバターを表示
次に、登録した画像をユーザー一覧に表示するためのコードを記述。
以下のコードをfunctions.phpに記述しました。
function custom_user_avatar($avatar, $id_or_email, $size, $default, $alt) {
	$user_id = 0;
	if (is_numeric($id_or_email)) {
		$user_id = (int) $id_or_email;
	} elseif (is_string($id_or_email) && !empty($id_or_email->user_id)) {
		$user_id = (int) $id_or_email->user_id;
	} else {
		$user = get_user_by('email', $id_or_email);
		if ($user) {
			$user_id = $user->ID;
		}
	}

	$custom_user_image_id = get_user_meta($user_id, 'custom_user_image_id', true);
	if ($custom_image_id) {
		$custom_image_url = wp_get_attachment_url($custom_image_id);
		if ($custom_image_url) {
			$avatar = '<img src="' . esc_url($custom_image_url) . '" alt="' . esc_attr($alt) . '" width="' .(int) $size . '" heigth="' .(int) $size . '" style="border-radius: 50%;">';
	}
}

return $avatar;
}

add_filter('get_avatar', 'custom_user_avatar', 10, 5);
これで、ユーザー一覧ページでも画像が表示されるようになります。
登録画像を表示するコード
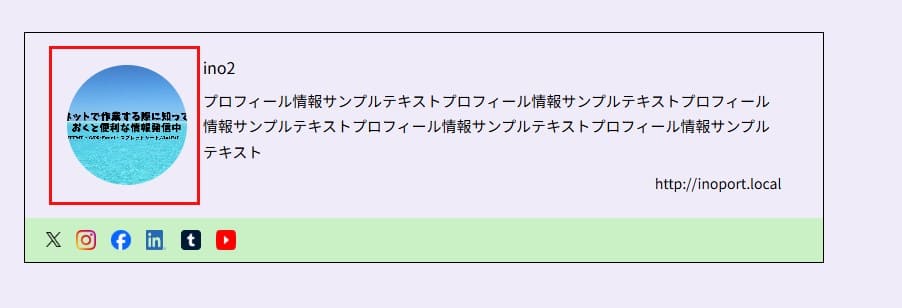
最後に、登録したプロフィール画像を表示するコードを追加します。
これにより、プロフィール写真として画像を表示できます。
プロフィール写真の表示
投稿者情報のページに画像を表示する場合は以下のコードをテーマファイルに追加。
今回はsingle.phpに下記のコードを記述しました。
<div class="profile-image">
	<?php
		$author_id = get_post_field('post_author', get_the_ID());
		$custom_image_id = get_user_meta($author_id, 'custom_user_image_id', true);
		$custom_image_url = $custom_image_id ? wp_get_attachment_url($custom_image_id) : '';

	if ($custom_image_url) {
			echo '<img src="' . esc_url($custom_image_url) . '" alt="プロフィール画像" style="width: 100%; height: 100%; border-radius: 50%;">';
	} else {
			// デフォルトのアバター画像を表示
			echo get_avatar(get_post_field('post_author', get_the_ID()), 130);
	}
	?>
</div>
まとめ
以上の手順で、WordPressのユーザープロフィールページにプロフィール画像を登録する機能を追加できます。
プロフィール画像があることで、ユーザー同士の視覚的な認識が容易になり、サイト全体のデザインも向上します。
投稿者情報の詳細表示方法については、こちらの記事でも詳しく解説しています。ぜひチェックしてみてください!

エックスサーバーでWordPressを始めてみませんか?
この記事で紹介したように、WordPressではユーザーごとのプロフィール画像を簡単に登録し、表示することができます。
こうした便利な機能を活用するためには、まずWordPressサイトを運営する環境が必要です。
もしまだWordPressを始めていない方は、エックスサーバーの利用をおすすめします!
エックスサーバーは以下のような特徴があり、初心者から上級者まで幅広いユーザーに支持されています。
高速・安定したサーバー環境
表示速度が速く、アクセスが集中しても安定して動作します。
簡単なWordPressインストール
WordPress簡単インストール機能で、わずか数分でサイトを立ち上げられます。
手厚いサポート体制
電話やメールでのサポートが充実しているので、初めての方でも安心です。
エックスサーバーの新規登録はこちら
エックスサーバーの新規登録は、期間限定でお得なキャンペーンを実施中です!今ならドメインが無料で取得できる特典も付いています。
WordPressでのサイト運営を考えている方は、この機会にぜひエックスサーバーでサイトをスタートしてみてください。


コメント