今回は、画像に文字等重ねて、中央に配置したい場合の
やり方、positionを使うと簡単にできます。
その時の注意点、実際に私が失敗したので
改善前と改善後の方法を書いてみました。
コードを書く時には、レスポンシブの事も考えて
出来るだけ、まとまりで書くようにしましょう。
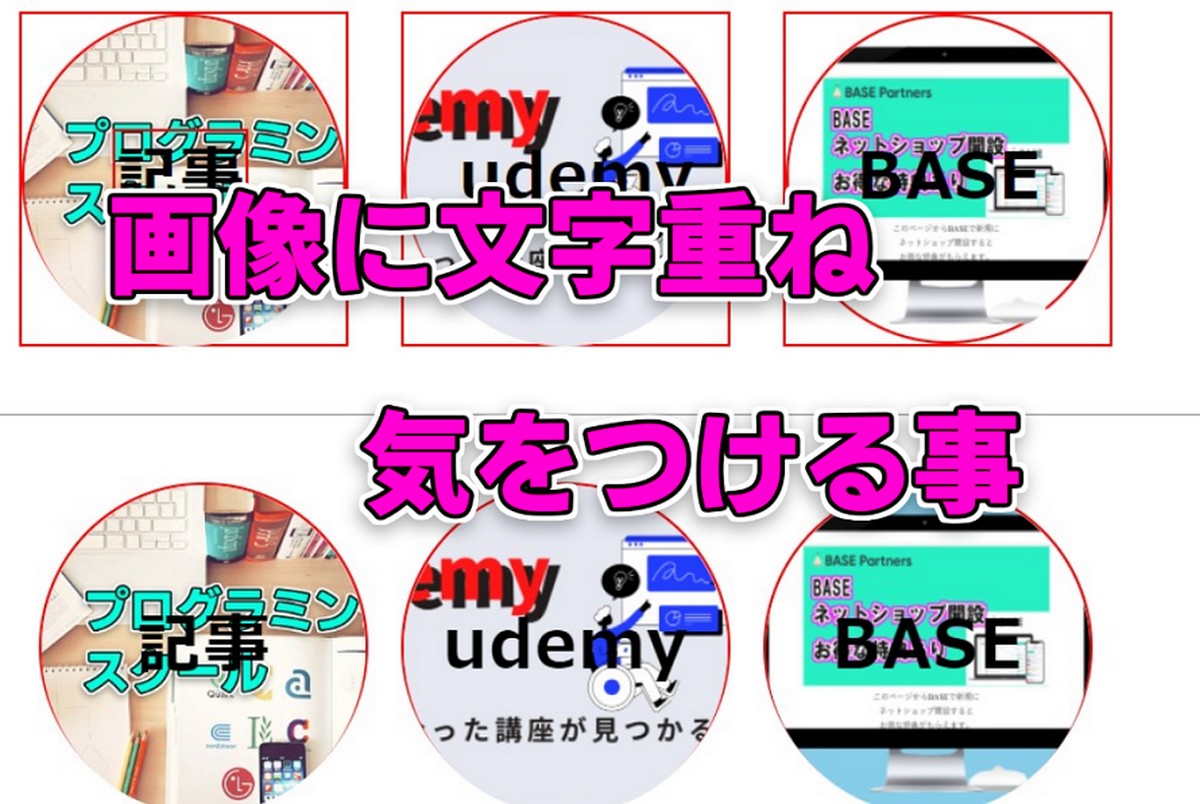
今回の失敗した事は、文字の配置をする時に、positionを
使って配置の指定をしたが、個別で左右の配置を指定してるので、
画像がずれると中央指定がずれる。
微調整するのが大変になる。
改善したところは、文字の配置設定方法を変えたので、
文字と画像の配置がずれなくなった。
またレスポンシブの設定も大枠の位置・サイズの指定で
可能になった。
では実際にやった方法を書いていきます。
レスポンシブしやすい設定
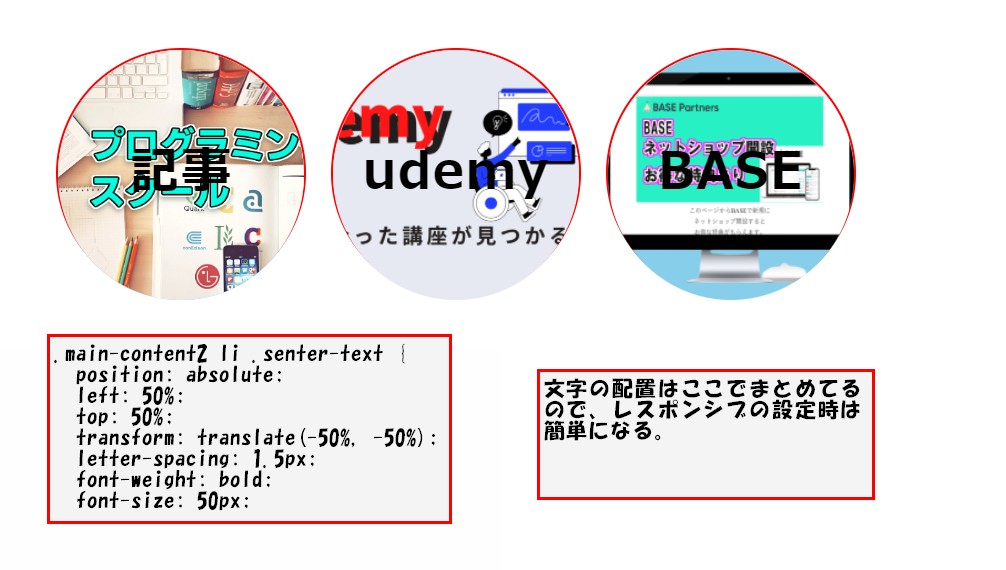
実際に書いたコードはこちら。
HTML
  <div class="big-bg">
    <div class="maru-img">
      <ul class="main-content2">
        <li class="sotowaku">
          <a class="rinkubox" href="salon.html">
            <img src="http://inomiti.com/a/lnk/inok/" alt="">
          </a>
          <a class="senter-text" href="http://inomiti.com/a/lnk/inop/">
            記事
          </a>
        </li>
        <li class="sotowaku">
          <a class="rinkubox" href="menu.html">
            <img src="http://inomiti.com/a/lnk/ude/" alt="">
          </a>
          <a class="senter-text" href="http://inomiti.com/a/lnk/usell/">
            udemy
          </a>
        </li>
        <li class="sotowaku">
          <a class="rinkubox" href="notes.html">
            <img src="http://inomiti.com/a/lnk/baseb/" alt="">
          </a>
          <a class="senter-text" href="http://inomiti.com/a/lnk/basep/">
            BASE
          </a>
        </li>
      </ul>
    </div><!-- /.maru-img -->
  </div><!-- big-bg -->
CSS
* {
box-sizing: border-box;
}
a {
text-decoration: none;
}
li {
list-style: none;
}
.big-bg {
max-width: 900px;
}
.main-content2 {
display: flex;
justify-content: space-between;
padding: 0;
margin: 50px;}
.sotowaku {
position: relative;
max-width: 250px;
min-height: 250px;
border-radius: 50%;
}
.rinkubox {
display: block;
height: 250px;
max-width: 250px;
border-radius: 50%;
}
.main-content2 img {
height: 250px;
width: 100%;
border-radius: 50%;
object-fit: cover;
vertical-align: bottom;
background: skyblue;
}
.maru-img ul li a .rinkbox {
display: block;
width: 250px;
height: 250px;
border-radius: 100%;
}
.main-content2 li .senter-text {
position: absolute;
left: 50%;
top: 50%;
transform: translate(-50%, -50%);
letter-spacing: 1.5px;
font-weight: bold;
font-size: 50px;
}
.main-content2 li a {
font-weight: bold;
color: #000;
}
文字を上下左右中央に配置する方法
今回書いたコード
.sotowaku {
position: relative;
}
.main-content2 li .senter-text {
position: absolute;
left: 50%;
top: 50%;
transform: translate(-50%, -50%);
letter-spacing: 1.5px;
font-weight: bold;
font-size: 50px;
}
今回は画像と文字を sotowaku で囲んで、
positionを使って上下のセンター
左右のセンターに配置してる。
sotowaku を position: relative;で指定
今回は文字を上下左右の中央に配置したいので、
文字に position: absolute; を指定。
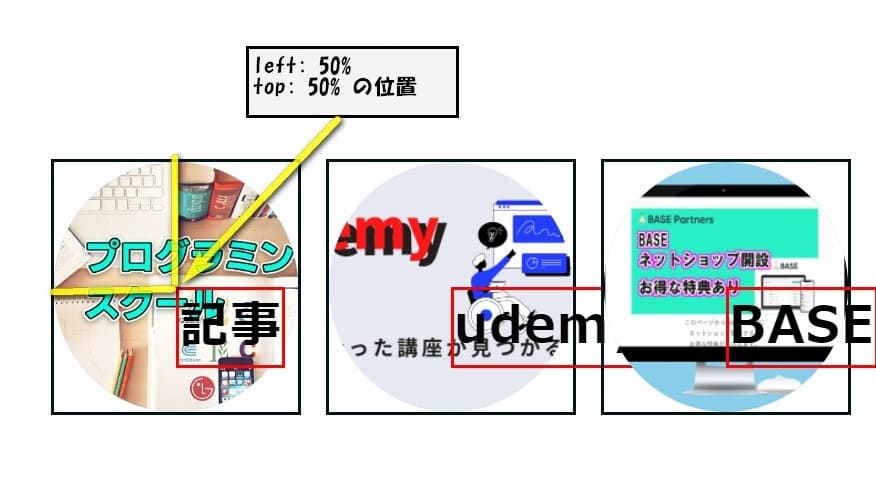
left: 50%; sotowakuの左から真ん中の位置
top: 50%; sotowakuの上から真ん中の位置
ただこの状態だと、それぞれ中の文字の、上端・左端
を基準で配置されるので、下図のようになる。
そこで transform: translate(-50%, -50%);
を使って文字の幅のサイズ・高さのサイズをそれぞれ
100%として、その半分50%分をずらす指定(-50%)で、
まん中にもってきてる。
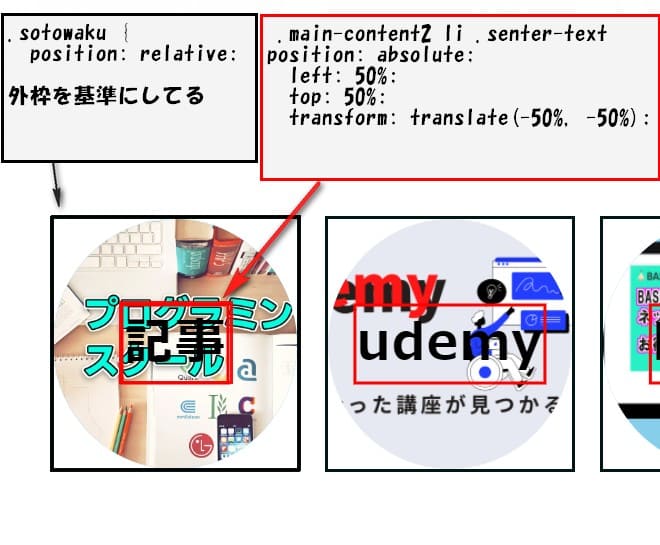
この方法設定しておくと、sotowakuのサイズを
レスポンシブで小さくした場合も自動でセンターに
配置されるので簡単です。
最初にやったレスポンシブ時に困った方法
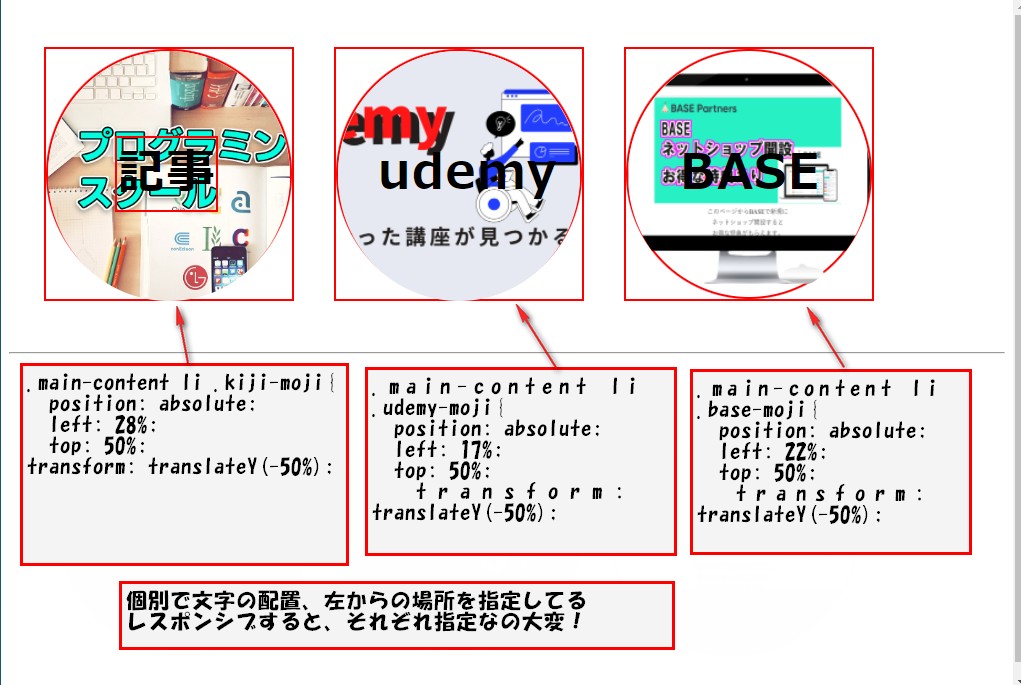
実際に書いたコード
HTML
<div class="big-bg">
  <div class="maru-img">
    <ul class="main-content">
      <li class="soto">
        <a class="rinkubox" href="salon.html">
          <img src="http://inomiti.com/a/lnk/inok/" alt="">
        </a>
        <a class="kiji-moji" href="http://inomiti.com/a/lnk/inop/">
          記事
        </a>
      </li>
      <li class="soto">
        <a class="rinkubox" href="menu.html">
          <img src="http://inomiti.com/a/lnk/ude/" alt="">
        </a>
        <a class="udemy-moji" href="http://inomiti.com/a/lnk/usell/">
          udemy
        </a>
      </li>
      <li class="soto">
        <a class="rinkubox" href="notes.html">
          <img src="http://inomiti.com/a/lnk/baseb/" alt="">
        </a>
        <a class="base-moji" href="notes.html">
          BASE
        </a>
      </li>
    </ul>
  </div><!-- /.maru-img -->
</div><!-- big-bg -->
CSS
* {
box-sizing: border-box;
}
a {
text-decoration: none;
}
li {
list-style: none;
}
.big-bg {
max-width: 900px;
}
.main-content {
max-width: 100%;
display: flex;
justify-content: space-between;
padding: 0;
margin: 49px 35px 51px;}
.soto {
position: relative;
max-width: 250px;
height: auto;
/* border-radius: 50%; */
}
.main-content img {
/* position: relative; */
height: 250px;
width: 100%;
border-radius: 50%;
object-fit: cover;
vertical-align: bottom;
}
.main-content li {
letter-spacing: 1.5px;
font-weight: bold;
font-size: 48px;
}
.main-content li a {
font-weight: bold;
color: #000;
}
.main-content li .kiji-moji{
position: absolute;
left: 28%;
top: 50%;
transform: translateY(-50%);
}
.main-content li .udemy-moji{
position: absolute;
left: 17%;
top: 50%;
transform: translateY(-50%);
}
.main-content li .base-moji{
position: absolute;
left: 22%;
top: 50%;
transform: translateY(-50%);
}
.rinkubox {
display: block;
height: 250px;
max-width: 250px;
border-radius: 50%;
}
数値で指定して配置する方法
書いたコード
.main-content li .kiji-moji{
position: absolute;
left: 28%;
top: 50%;
transform: translateY(-50%);
こちらは、上下のセンターはさっきと同じです。
transform: translateY(-50%);の
translateYの部分で上下なんでY軸の指定をしてます。
左右のセンターは left: 28%; で指定
sotowakuの左端から 数値で指定してるので、
外枠の変化に連動されず、センター位置を保つのが
大変。
また、この方法だと他の2つもそれぞれで指定
するひつようがあるので、レスポンシブする際
大変になる。
なので、この方法はオススメしないです。
こんな感じで、コードの書き方はいろいろあるので、
参考にしてみてください。
ご自身で書きやすいコードを書いていくのがベストです。
CodePenでも書いてるのでそちらも参考にしてください。


コメント